<< Previous [1] [2] [3] Next >>
The project should be stitched with the following settings:

This will result in a layered Photoshop file. The bottom layer contains the blended result, while the other layers above it contain one warped source image each. These 'individual' layers have a transparent blend mask, so by default we only see the bottom layer containing the blended panorama.
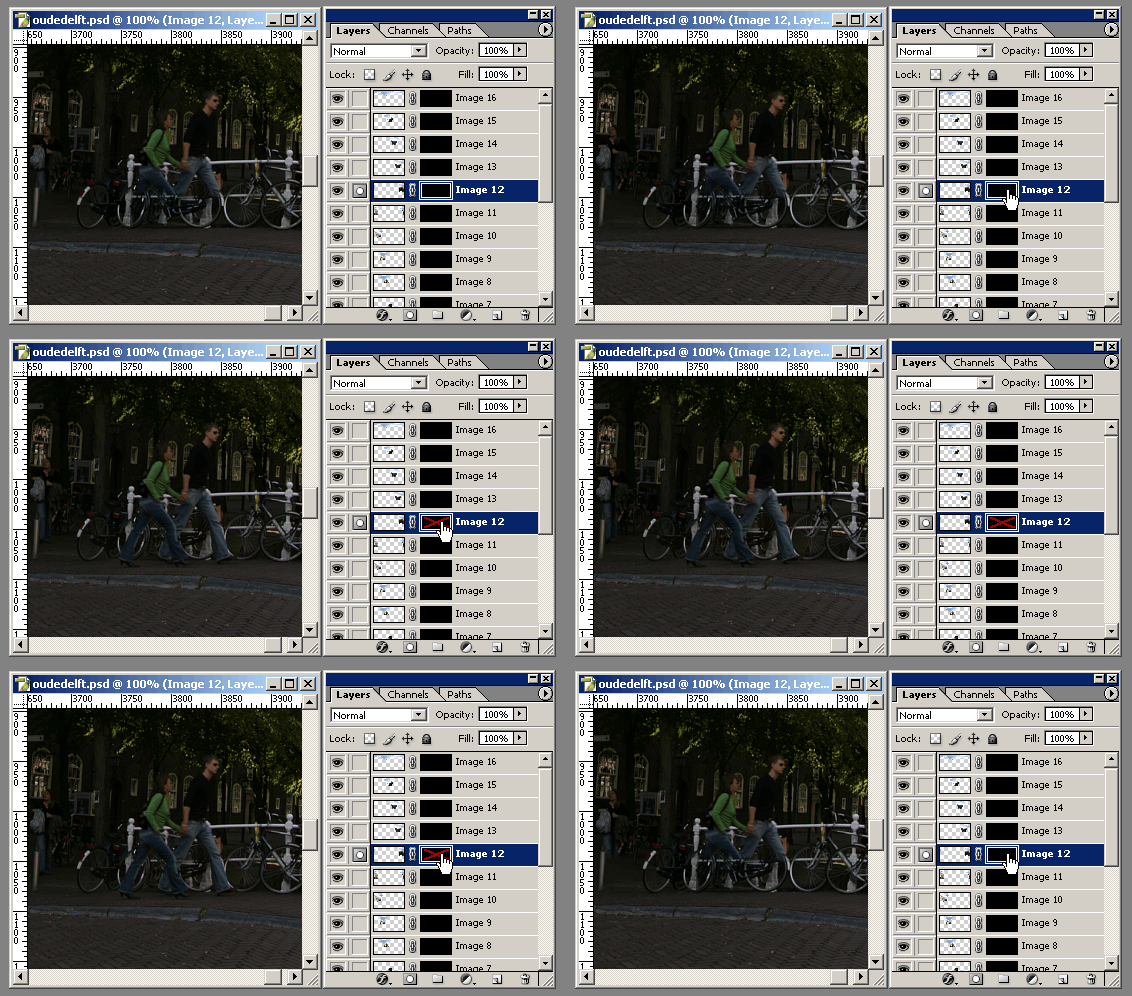
In Photoshop, we can temporarily make a layer's blend mask opaque by shift-clicking on the layer mask in the Layers palette. This disables the mask and effectively overlays an individual warped image over the blended panorama:

Use this technique to determine which is the layer that needs to be overlaid.
It may still be difficult to see the edge of the image or where the seam should be; just turn off the bottom blend panorama layer and the layer in question will be the only layer visible. Now you can see the edge of the image.
<< Previous [1] [2] [3] Next >>
The project should be stitched with the following settings:

This will result in a layered Photoshop file. The bottom layer contains the blended result, while the other layers above it contain one warped source image each. These 'individual' layers have a transparent blend mask, so by default we only see the bottom layer containing the blended panorama.
In Photoshop, we can temporarily make a layer's blend mask opaque by shift-clicking on the layer mask in the Layers palette. This disables the mask and effectively overlays an individual warped image over the blended panorama:

Use this technique to determine which is the layer that needs to be overlaid.
It may still be difficult to see the edge of the image or where the seam should be; just turn off the bottom blend panorama layer and the layer in question will be the only layer visible. Now you can see the edge of the image.
<< Previous [1] [2] [3] Next >>