We've added several handy new features to PTGui 9.1! Below is a quick overview.
For a detailed list of new features and changes see the version history. Read the included online help to learn more about a specific feature: context help is available in most screens by pressing F1 (Windows) or Fn+F1 (Mac), or by clicking the Help button in certain windows.

A common problem when stitching very large panoramas taken with a long lens is that you may end up with several images with no recognizable detail, for example pure blue sky or just a white wall. In those images no control points can be found and the optimizer will not know where to place them. Align to Grid allows you to predefine the panorama geometry.
Further the optimizer has been improved to keep 'orphaned' images (i.e. images without any control points) together with the rest of the panorama. So the grid setup will persist even after optimization. This makes creating gigapixel panoramas with PTGui a snap!
We've created a tutorial: Creating gigapixel panoramas with a robotic panohead
Automatically generated control points in the previous version:

Automatically generated control points in PTGui 9.1:

Fisheye lenses exhibit strong curving of the images near the edges of the image. Although previous versions of PTGui could cope with this distortion, there still was a tendency to place control points closer to the center of the frame. PTGui 9.1 will place more control points near the edges and attempt to spread control points over the entire overlap area. This spreading of control points allows the optimizer to calculate the lens distortion very accurately.
Additionally, the optimizer will now optimize for lens shift by default. Previously this had to be enabled manually in Advanced mode. Optimizing for lens shift can greatly improve the alignment of images taken with a wide angle lens.

The selection can be made by dragging with the mouse while holding down the Shift key. Control points in the selected area can be deleted by pressing the Delete key, or by right-clicking on one of the control points inside the rectangle.
And it's now possible to generate control points in a selected area. To do so select an area using Shift+drag, right click in the area and choose 'Generate Control Points Here':


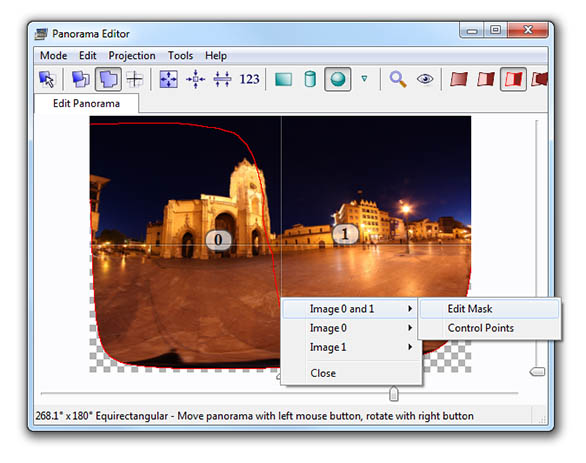
Furthermore the Panorama Editor and the Detail Viewer now display the image numbers:

You can upgrade from an earlier version to PTGui 9.1 for an upgrade fee, or free of charge, depending on the original purchase date. A free trial version is available; you can use it next to your current version by installing to a different folder.
Previous versions:
What was new in PTGui 9.0?
For a detailed list of new features and changes see the version history. Read the included online help to learn more about a specific feature: context help is available in most screens by pressing F1 (Windows) or Fn+F1 (Mac), or by clicking the Help button in certain windows.
Align to Grid
PTGui 9.1 makes it easy to create gigapixel panoramas using a motorized panoramic head. The new Align to Grid tool arranges the images into a grid of rows and columns:
A common problem when stitching very large panoramas taken with a long lens is that you may end up with several images with no recognizable detail, for example pure blue sky or just a white wall. In those images no control points can be found and the optimizer will not know where to place them. Align to Grid allows you to predefine the panorama geometry.
Further the optimizer has been improved to keep 'orphaned' images (i.e. images without any control points) together with the rest of the panorama. So the grid setup will persist even after optimization. This makes creating gigapixel panoramas with PTGui a snap!
We've created a tutorial: Creating gigapixel panoramas with a robotic panohead
Improved alignment of wide angle images
Let's just show a screenshot:Automatically generated control points in the previous version:

Automatically generated control points in PTGui 9.1:

Fisheye lenses exhibit strong curving of the images near the edges of the image. Although previous versions of PTGui could cope with this distortion, there still was a tendency to place control points closer to the center of the frame. PTGui 9.1 will place more control points near the edges and attempt to spread control points over the entire overlap area. This spreading of control points allows the optimizer to calculate the lens distortion very accurately.
Additionally, the optimizer will now optimize for lens shift by default. Previously this had to be enabled manually in Advanced mode. Optimizing for lens shift can greatly improve the alignment of images taken with a wide angle lens.
Area selection in Control Points tab
It's now possible to select a rectangular area in the Control Points tab:
The selection can be made by dragging with the mouse while holding down the Shift key. Control points in the selected area can be deleted by pressing the Delete key, or by right-clicking on one of the control points inside the rectangle.
And it's now possible to generate control points in a selected area. To do so select an area using Shift+drag, right click in the area and choose 'Generate Control Points Here':

Ghost mouse pointer
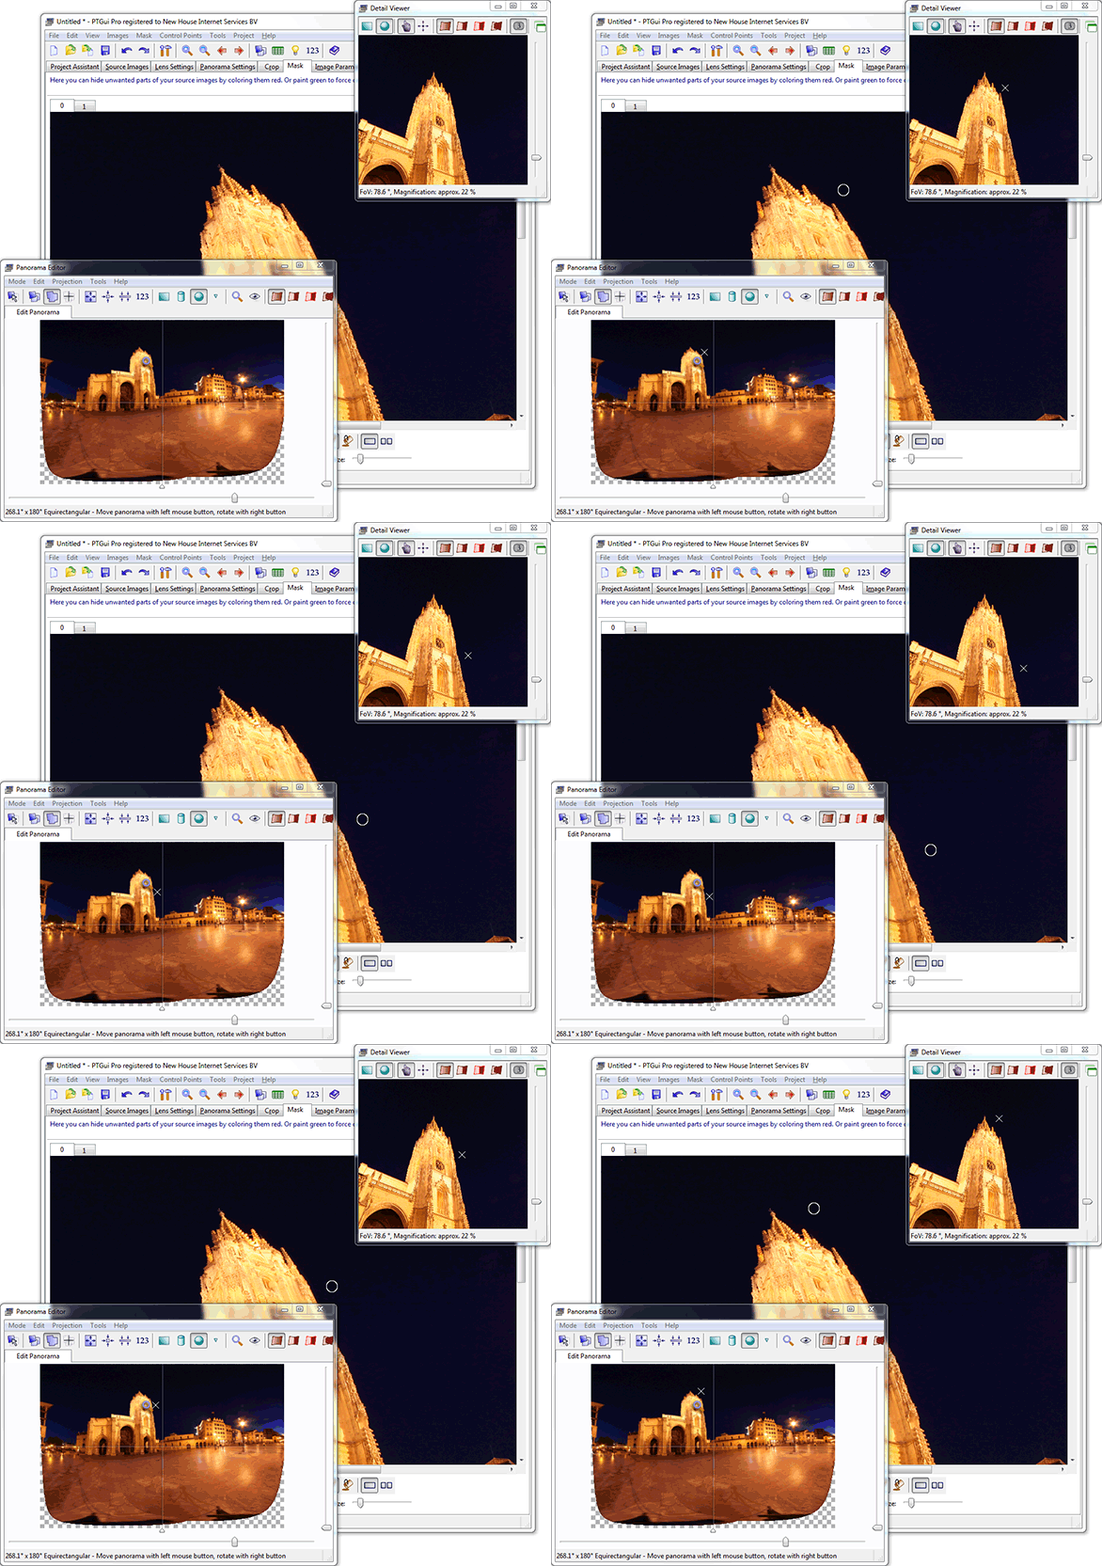
When moving the mouse over an image in one of the windows or tabs in PTGui 9.1, a little 'x' shaped cursor is displayed in all other windows at the same location. This makes it easy to find the corresponding point in another image or in the stitched panorama:
Split Mask tab
In PTGui Pro 9.1 you can have two images side by side for masking:
Panorama Editor context menu and image numbers
Right clicking in the Panorama Editor or in the Detail Viewer will bring up a context menu. From this context menu you can quickly jump to the corresponding point in the Mask and Control Points tabs.Furthermore the Panorama Editor and the Detail Viewer now display the image numbers:

Other changes
For a list of all changes see the version history. To try out the new features PTGui 9.1 can be downloaded here.You can upgrade from an earlier version to PTGui 9.1 for an upgrade fee, or free of charge, depending on the original purchase date. A free trial version is available; you can use it next to your current version by installing to a different folder.
Previous versions:
What was new in PTGui 9.0?